

Most folding knife problems that send people looking for a new knife are actually two or three year maintenance problems with a fifteen minute fix. Grit in the pivot, dried lubricant, pocket lint packed into a lock bar relief cut, a blade that has drifted off centre: all of it is accessible the moment the knife comes apart. Taking a folding knife down is not risky or complicated, but it does reward a little preparation, and it goes badly in a few predictable ways when you skip it.
Pivot screws, washers, and bearing cages are small and specific to each side: lay them out in order and the reassembly is straightforward.
When You Should and Should Not Take a Knife Apart
Disassembly makes sense for deep cleaning after the knife has been exposed to sand, salt water, or food; for chasing a gritty or slow action; for re-centring a blade; and for adding lubricant where it actually needs to go instead of on the outside of the pivot.
It is usually a mistake when the knife is new and merely stiff. A new knife with a firm detent and a tight pivot needs break-in, not a teardown, and the sequence is explained in our guide to breaking in a new folding knife. It is also a mistake if you already have a working knife and simply want to look inside out of curiosity, and it is worth checking whether your model carries a warranty that a teardown could complicate before you start.
Tools You Actually Need
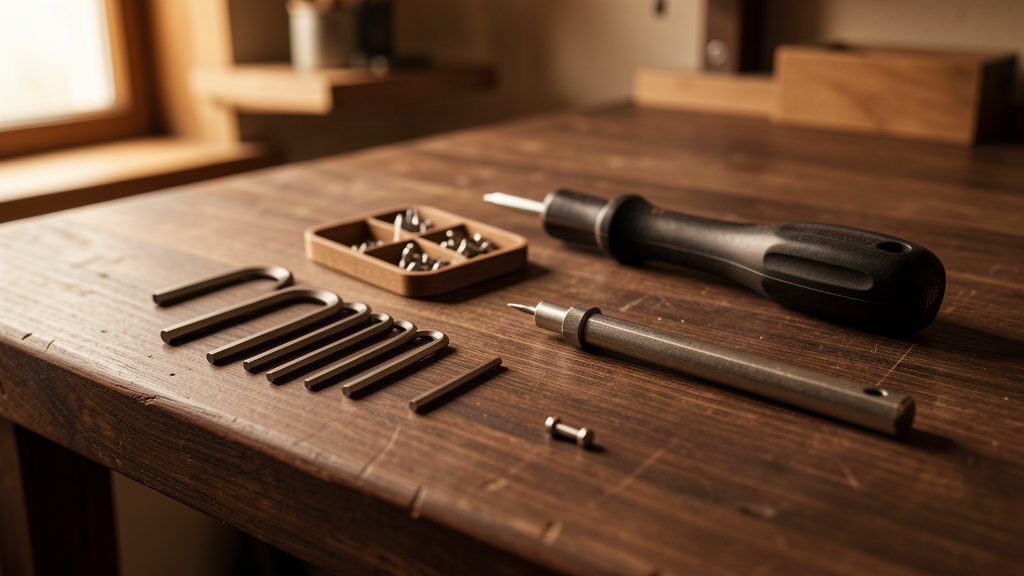
Most modern folding knives are assembled with Torx fasteners, a six pointed star drive that tolerates torque better than a slot or Phillips head at these tiny sizes. If you are not familiar with the drive, the Torx standard is worth a quick read, and a set of small hex keys covers the odd model that mixes drive types. What you actually need on the bench:
- A quality driver set with Torx bits in the T5, T6, T8, and T10 sizes. Cheap bits strip cheap screws, and stripped pivot screws are the single most common way a simple job becomes a hard one.
- A shallow tray or tray-lined mat. Pivot screws, washers, and stop pins are small, and they roll.
- A clean, lint free cloth and a few cotton swabs for cleaning recesses.
- A light knife oil or a purpose made pivot lubricant, plus a low strength removable threadlocker if the pivot screw keeps backing out.
- A magnetic parts dish or a strip of tape to hold screws in the order they came out. Tape is also useful for keeping washers stuck to the blade so they do not vanish.
- Good light and a clean surface. This is the whole ballgame for not losing the small parts.
Before You Start: Prep and Safety
- Close the knife and treat it as sharp the whole time. A blade lying on the bench next to a screwdriver is a blade that gets knocked.
- Clear the bench. Nothing else on the surface while you work.
- Photograph the knife from a few angles, and photograph each stage as you remove parts. When reassembly goes wrong an hour later, the photos tell you what you had.
- Work over the tray, not the floor. If something drops, it drops into the tray.
Step by Step: Disassembling a Folding Knife
- Loosen, do not remove, the pivot screw first. Break the pivot free while every other screw is still tight and the knife is still holding its shape. That is the highest torque fastener on the knife, and it is easiest to crack loose as the first move.
- Note the order of every fastener. Lay each screw onto your tape in the position it came from. Pivot screws, body screws, and clip screws are frequently different lengths, and swapping a long body screw into a short hole can punch through a scale.
- Removing the scales is a two handed job. Once the body screws are out, hold the knife closed, lift one scale straight off rather than prying, and keep a finger over the pivot area so washers and bearings do not jump.
- Watch for the pivot washers. Many knives run one washer per side, and a knife with bearings usually runs a bearing cage per side with a thin washer against the scale. They are very easy to lose and very easy to reinstall backwards. Handle them over the tray.
- Lift the blade out of the handle. With the pivot pin free, the blade and its washers come out of the handle as a unit. Keep the washers with the blade. Set the handle aside where nothing will fall on it.
- Separate the lock side from the liner. On a liner lock, the steel liner sits inside the non locking side or alongside the locking scale. Take note of which way the liner faces; it only goes back one way correctly.
- Do not remove the clip unless you need to. There is no maintenance reason to take a pocket clip off, and each removal adds thread wear to small screws.
- Keep the stop pin and any detent hardware with the handle. These are captive on most designs but can drop out on a few. If one falls free, put it on the tape in its own slot.
Cleaning While It Is Apart
This is the part that actually fixes the knife, so take your time. Wipe the blade down with a cloth and clean dried lubricant out of the pivot hole with a swab. On a bearing model, do not reach for solvent on the bearing cage. Blow or brush debris out and leave the lubrication to the bearings themselves; a wash in solvent strips the original lubricant and can leave grit in places you cannot see. Our cleaning and sanitizing guide covers what is safe to use on a blade, and how to remove rust from knife blades covers the corrosion cases.
On the handle, most lint and grit collects in the lock bar relief cut, inside the pivot recess, and behind the clip. A swab handles all three. Wipe the liners dry rather than oily; the liner lock contacts the blade tang, and you do not want lubricant migrating into the locking interface where it can attract grit.
If it is a slip joint rather than a locking knife, the same sequence applies minus the lock liner, with the addition of a wipe through the spring channel.
Reassembly: Getting It Back Together Right
- Start with the washers and bearing cages. Put each one back on its side of the blade or into its pocket in the scale, with the open side or race facing the way it came out.
- Seat the blade in the handle. Lower the blade and its washers into the handle, then bring the second scale down onto it. Do not force anything; if the scale will not sit flat, a washer is out of place.
- Install the pivot first, then the body screws. Fit the pivot and screw it in until it is just snug, then fit the body screws. Thread the pivot in by hand to make sure it is not cross threaded before you apply any torque.
- Tighten in a cross pattern, gradually. Snug each screw a little at a time, moving across the handle, so the scales seat evenly and the blade stays centred.
- Snug means snug, not tight. These are small screws into a thin liner or scale. Firm contact with a short driver is enough; if you are leaning, you are past the point and likely to strip the head or crack a scale.
- Add threadlocker only if you need it. If the pivot screw has backed out on you before, a low strength removable threadlocker on the pivot threads, described in the thread locking fluid reference, stops it walking without making the next teardown difficult. Never use a permanent grade on a pivot.
Tuning After Reassembly: Pivot Tension and Blade Centering
The pivot screw sets two things at once: how freely the blade swings and where it sits when closed. Backing it out slightly makes the action faster and can let the blade drift off centre; tightening it centres the blade and slows the action. The reliable method is to set centring first, then adjust the pivot in small increments until the action is right, checking after each quarter turn rather than making one big change.
If the blade is off centre with the pivot snug, loosen the body screws near the pivot a touch, push the blade over with your thumb, and re-snug them. Body screw tension pulls the scales slightly and that is usually the whole cause. If you end up with side to side movement at the tip instead, work through our guide to folding knife blade play, and if the opening feels vague afterwards, check the detent tension guide.
The pivot assembly itself is worth understanding before you adjust it. Washer and bearing based knives behave differently as they wear, and our pivot systems guide explains which is which and how to keep each smooth, while folding knife action covers what good action feels like when it is set correctly.
Common Mistakes
- Using the wrong sized bit. A T6 that is a loose fit in a T6 screw chews the head. Fit matters more than brand.
- Taking the pivot out last. Once the body screws are loose, the pivot can spin the whole blade assembly and become far harder to break free.
- Losing track of washer and cage orientation. Reversed hardware is the most common cause of a knife that suddenly feels gritty or slow after a clean it should have improved.
- Over oiling. More lubricant does not mean a smoother knife. Excess oil collects lint and abrasive dust and turns into the exact paste you were trying to remove.
- Working over carpet or a cluttered desk. Pivot screws are a few millimetres across, and a fifteen minute job becomes a week long wait for a replacement screw.
- Forcing a scale. If a scale does not seat, something is misaligned. Take it off and look, rather than pressing harder.
If you are not comfortable working on a particular knife, there is no shame in stopping. A professional sharpsmith can service a folder for less than the cost of a replacement pivot screw kit, and heavier jobs such as reprofiling an edge are worth handing over, as covered in our guide to common sharpening mistakes.
Disassembly FAQ
Do I need to disassemble a folding knife to clean it?
Not usually. A wipe down, a compressed air blast, and a drop of oil on the pivot handle most maintenance, and the schedule is set out in our folding knife maintenance schedule. Teardowns are for grit, corrosion, and adjustment jobs.
What size Torx does a folding knife use?
Most modern folders use T6 or T8 for the pivot and body screws and T10 for larger frame screws, which is why a set covering T5 through T10 is the practical purchase. Sizes vary by maker and model, so check fit before applying torque rather than assuming.
Can I use WD-40 or cooking oil on my knife pivot?
Neither is a good pivot lubricant. WD-40 is a water displacer rather than a lasting lubricant, and cooking oil oxidises and gums up. A light purpose made knife oil or a proper pivot lubricant is the right choice, as covered in our knife lubrication guide.
Will disassembling my knife void the warranty?
Policies vary by manufacturer and region, so check your own model's documentation before opening it up. For a knife still under warranty with a defect, contact the maker first rather than reaching for the driver.
How often should I take my knife apart?
For a knife carried daily in a pocket, once or twice a year is plenty unless it has been exposed to sand, salt water, or food. Working knives used in dusty or wet environments may want a teardown with each season change.


Leave a comment
This site is protected by hCaptcha and the hCaptcha Privacy Policy and Terms of Service apply.